How to get started with Azets Expense
Azets Expense is a simple and user-friendly tool for managing business travel and expenses. With Azets Expense, you can record travel and expenses either through the web browser or using the mobile app.
Features in the app
The Azets Expense app can be downloaded from the App Store or Google Play. Once the app is installed, you can log in using the same username and password as in Azets Cozone. If you have access to multiple companies, you can switch at the top of the screen.
Azets Expense works the same way as all our cloud-based systems; access and login are done through the Azets Cozone portal. When logging into Azets Expense, you will be redirected to the Cozone login page. Once logged into Cozone you will then also be logged into the Azets Expense app.
When you open the app, you will see a dashboard that provides an overview of unprocessed travel claims and expenses. You can easily view and manage the reports by navigating to the expense reports section.
In addition to managing expenses, the app provides notifications about important events and tasks. This ensures that you are always informed about necessary actions.
When you open the app, you will see a dashboard that gives you an overview of unanswered reports and expenses. You can easily view and manage the reports by navigating to the expense reports section.
Under Expense Reports, you can see both sent and unprocessed reports.
Create a new expense or report by clicking on the plus sign in the bottom menu.
Under notifications, represented by the bell symbol, you will find a list of tasks and notifications.
Under the three dots, you will find Personal Settings, where you can customize your account in Azets Expense. Here you can make changes such as:
- Change date format
- Change profile picture
- Change currency
- Activate automatic receipt analysis
- Turn on/off automatic VAT calculation
- Camera view settings
- Add more email addresses from which you can send receipts
Features in the web browser
If you prefer using a computer, you can also manage your expenses in a web browser. Go to Azets Expense or through the Azets Cozone portal and log in with your user account. Here, you can create new travel claims and expenses and manage reports.
You log in in private mode. If you have administrator rights, you can switch between these roles by clicking on Private mode at the top of the window and selecting the role.
The menu on the left (under your profile picture) will always be visible in private mode. Here, you can navigate between the different functions on your account.
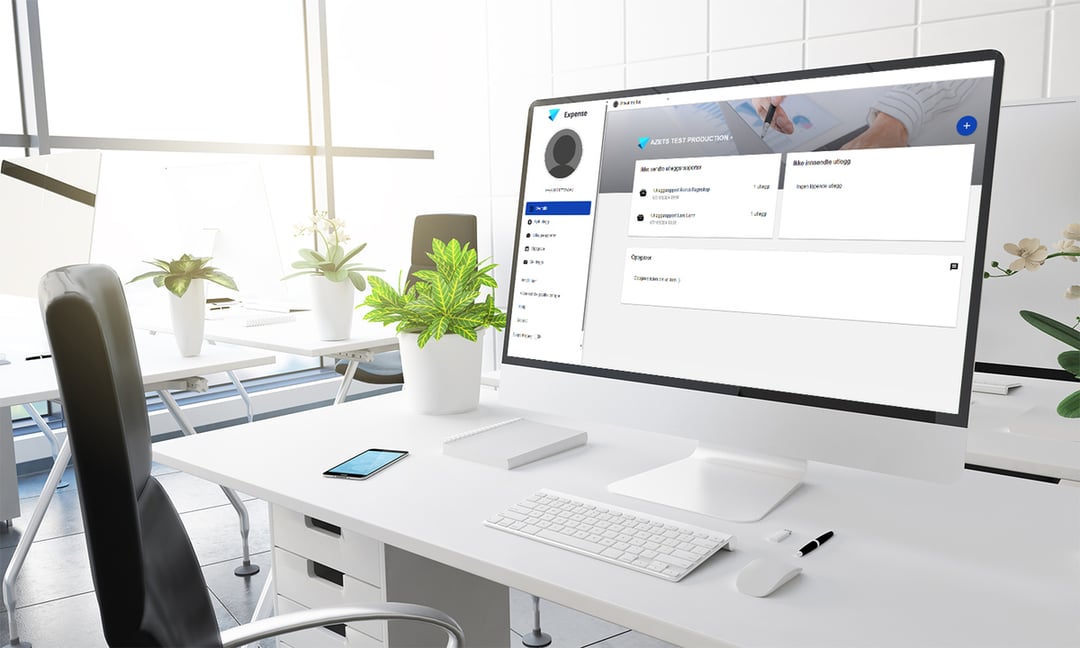
The first thing you see after logging in is your Dashboard. Here, you can switch companies by clicking on the current company name.
By pressing the plus symbol on the right side of the screen, you can add a new expense or a new expense report.
On the Dashboard, you can also view and manage your unprocessed reports, expenses, and tasks.
The next function in the menu to the left is New Expense. Here, you can create a new expense by selecting which organization you want to use or proceed to the next step if you are only registered with one organization. You can also choose the type of expense you want to add.
Your expense reports are collected here under the next function in the menu. Unprocessed reports show reports you have not yet sent to your employer. Sent reports show reports you have sent for approval. By clicking on a sent report and scrolling all the way down, you can see the report history. In the report history, you can see whether the report has been approved or not. If it is approved, you can see who approved it.
This is your list of tasks. When you have a new task, a red symbol appears in the menu. If you approve other users' expense reports, the reports that need approval will appear under your task list. Once you have handled the report, it will be moved to Resolved. If you have sent a receipt via email to Azets Expense and are registered with multiple organizations, you will find the receipt under your task list and can link it to the correct company from there.
Here you will see messages sent to you from the system or the company. For example, you may receive messages if your expense report is approved or rejected.
Under Settings, you can customize your Azets Expense experience.
- Change language
- Change date format
- Change profile picture
- Change currency
- Activate automatic receipt analysis
- Turn on/off automatic VAT calculation
- Add new email addresses you can send receipts from
If you receive receipts to your email, you can easily forward them to kvitto@azets.com
When the receipt is processed, an expense is automatically created on your account, which you can then add to an expense report. Remember, you must send the receipt from an email address linked to your user.
How can I add an expense?
To submit the expense to the company for reimbursement, add it to an expense report and submit the report.
Below is a step-by-step guide.
- Tap the plus button at the bottom of the screen.
- Select New Expense. This function will have different options depending on the company's settings.
- Take a picture of the receipt (the camera function opens automatically).
- Fill in the relevant fields and ensure that Category, Purchase Date, Amount, VAT, and Currency are correct (filled in automatically after the receipt is scanned). Note that the visible fields may vary depending on the organization's settings.
- Save, and you're done!
- Press the plus button at the top right.
- Select New Expense. You will see different options depending on your organization's settings.
- Attach the receipt by dragging and dropping or clicking to select from the hard drive.
- Fill in the relevant fields and ensure that Category, Purchase Date, Amount, VAT, and Currency are correct (filled in automatically after the receipt is scanned). Note that the visible fields may vary depending on the organization's settings.
- Save, and you're done!
How do I register representation?
Representation is another form of expense. The difference is that the category is defined as representation, and the options for Type and Attach participant list are shown.
When you have taken a picture of the receipt, there are three things you need to do (apart from making sure the details from the receipt are correct in the expense).
- Make sure the category is in the representation category. The easiest way to check this is by looking at the category name or if the representation box is visible (see next point). When you take a picture of the receipt, Azets Expense automatically interprets it and assigns it a category as shown in the image. Note that the name of the category may vary depending on your company. If the category is incorrect, click on it and choose the correct category from the list.
- Fill in who participated in the representation. You can add the participants one by one directly in the expense under Representation, or, if you prefer to attach a guest list, check the box next to Attach participant list. Remember to specify the number of guests who participated and upload the participant list under Attachments before submitting your expense. Also, select the type of representation under Type. Note that, depending on the company's settings, Type may not be available, and other mandatory fields may be visible.
- Finish by pressing the Save button at the bottom.
When you have attached the receipt, there are three things you need to do (apart from making sure the details from the receipt are correct in the expense).
- Ensure that the category is in the representation category. The easiest way to know this is usually by looking at the category name or if the entertainment box is visible (see the next point). When you take a picture of the receipt, Azets Expense automatically interprets the receipt and assigns it a category as shown in the image. Note that the name of the category may vary depending on your company. If the category is incorrect, click on the category and select the correct one from the list.
- It is mandatory to fill in who participated in the representation. You can choose to add the participants by adding them one by one directly in the expense under Representation or by attaching a participant list. Then, check the box next to Attach participant list. Remember to specify the number of guests who participated and to upload the participant list under More attachments before submitting your expense. Also, select the type of representation under Type.
- Finish by pressing the Save button at the bottom.
How do I register mileage reimbursement?
To register mileage reimbursement, tap the Plus button and select New Mileage Reimbursement. Once finished, add the mileage entry to an expense report and submit it for reimbursement.
- Tap the Plus button at the bottom.
- Select New Mileage Reimbursement.
- Fill in the relevant fields. By entering the address where you started the journey (origin) and the address that was your destination, you get a map of the fastest route and the number of kilometers (or miles if applicable). Select Round trip if you drove back the same way.
- Tap the save icon in the upper right corner, and you're done!
How do I register a per diem allowance?
- Click on New Expense and select New Per Diem Allowance.
- Click on the option Per Diem Abroad or Per Diem Domestic.
Domestic Per Diem
Fill in the dates and times of the trip. Click on the checkbox at the top right of the page to save the allowance.
Per Diem Abroad
Fill in the dates and times of the trip. You must also add the destination. Click on the checkbox at the top right of the page to save the allowance.
- Click on New Expense and select New Per Diem Allowance.
- Click on the option Foreign Allowance or Domestic Allowance.
Domestic Allowance
Fill in the dates and times of the trip and click Save when you are done with the allowance.
Foreign Allowance
Fill in the dates and times of the trip. You must also add the destination. Click Save when you are done with the allowance.
How do I submit my expenses?
When you have added one or more expenses and wish for them to be reimbursed, you need to create an expense report if this was not done at the same time as registering the expenses. You can include as many expenses, mileage reimbursements, or per diem allowances as you want in one report. Once the report is ready to be submitted, you can add a comment and preview the report. After the expense report is submitted, it goes for approval.
You can create and submit the expense report both in the mobile app and in the web browser. See the step-by-step guide below.
- Tap the plus button at the bottom.
- Click on Create Expense Report.
- Give the expense report a name in Purpose/Description. If you want, you can add a comment in the comment field.
- Select which expenses you want to add to the report. You can either add expenses individually by selecting them or choose Add all.
- If you want, you can preview the report by clicking on Preview; otherwise, click Send report, and you're done!
- Press the plus button to the right.
- Click on Create expense report in the pop-up window.
- Give the expense report a name in Description. If you want, you can add a comment in the comment field.
- Select which expenses you want to add to the report. You can either add expenses individually by selecting them or choose Add all.
- If you want, you can preview the report by clicking on Preview; otherwise, click Submit, and you're done!